
I have a vague memory of my mum keeping an emergency sewing kit in the glove compartment of her car. When I asked one of my brothers if he could recall the small plastic set, with its loose threads and tiny scissors he confessed that he now carries one too. In fact, he told me that just last week he’d used it to sew on a button while he and his girlfriend were travelling from Munich to Norway. (He’s always been irritatingly practical, but it turns out she sewed on the button).
While the sewing kit may no longer be a universal household item, the recent rise of thrift-flipping and easy access to online tutorials means the craft of mending is enjoying a reprise.
In honour of this, and as an antidote to sales season, we asked some experts for advice on how to build an at-home repair kit.
Start with quality
Since the process of sewing and mending is easier when things are precise, Rel Vild, the owner of Loom Fabrics recommends investing in quality tools from the beginning. “[They] will make you enjoy the process a whole lot more than struggling with poor quality scissors and thread.”
Go to a specialist retailer or haberdashery store – not the supermarket. “Your thread will not tangle and your edges will cut neatly so you will end up with a better result,” she says.
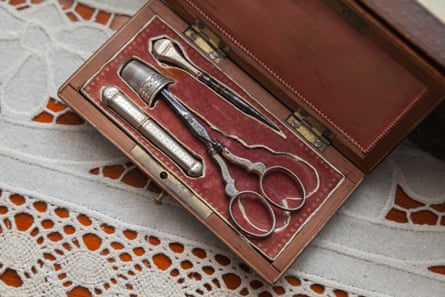
Pre-plastic fantastic
Secondhand items are worth keeping in mind when shopping for your tools. “I do think some of the best sewing notions are now considered vintage,” says Holly Simpson, owner of repair service Hot Dog Workshop. “I often look for secondhand equipment, anything pre-plastic fantastic. There’s so much from our past that is beautifully made and still performs the role perfectly, so why buy new?”
Keep your scissors sharp
The best foundation for your kit is “a pair of good quality tailor’s shears” Simpson says.
Only use these scissors to cut fabric. If you use them to cut other things like paper, card or craft items, the scissors will go blunt quickly and won’t work as well for fabric.
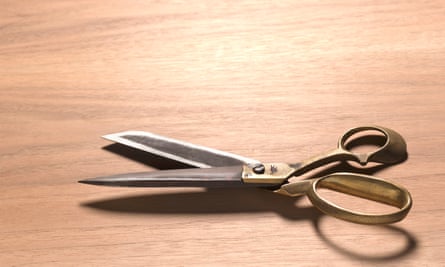
Vild warns that scissors bought in bulk packets don’t stay sharp for long and so need to be constantly replaced. Instead, she recommends buying scissors you can sharpen using a professional tool sharpening service. “It will cost you approximately $10 to sharpen scissors, so buy decent ones and look after them rather than sending lots of poor-quality ones into landfill.”
In addition to big shears, Simpson suggests getting a smaller pair of scissors or a thread snipper to cut threads and trim mess.
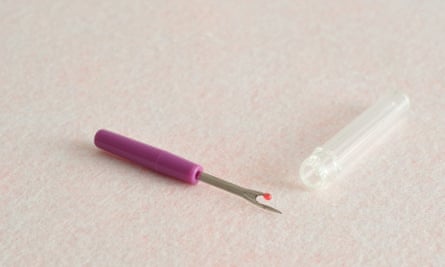
The next most useful thing in your kit will be an unpicker, a small tool with a pointy metal hook that helps undo any stitching mistakes. Vild recommends bigger unpickers because they are “easier to manage, the tiny ones are harder to control”.
When it comes to buying needles, she suggests looking for fine ones with decent-sized holes so they are easier to thread. These come in packets that have a variety of sizes which can be useful as you figure out what works for you.
You’ll also need a packet of pins – Simpson recommends the glass head ones as they are easier to handle. A pin cushion is also a handy way to keep pins together. Vild suggests choosing one you can fasten around your wrist. “When you drop them the pins do not spill out everywhere,” she says.
Other things that are useful but not necessarily essential include: a tape measure, a small embroidery hoop or a darning egg, a needle threader, a thimble, hook and eyes, iron-on patches, iron-on mending tape, chalk and safety pins.
Threads
When it comes to buying threads, Simpson suggests considering what you will be mending. Although you don’t need an exact match for every project, if you have a colour scheme in your wardrobe try to blend your thread palette to it.
“A cotton-polyester blend is strongest and offers longevity, you’ll need a black and white/natural in your kit, then choose colours in a mid-tone that can be used across darker or lighter shades,” she says.
Scraps and buttons
Depending on the type of repair you are going for, you may or may not want to keep scraps on hand. “If you want things to look repurposed/upcycled then these items can be handy and fun, but if you are after a neater look I don’t think saving things is super helpful,” says Vild.
Instead, Simpson suggests keeping a pair of old jeans and a shirt on hand to cut patches from, a ball or two of wool to darn with, and some cotton cord. She says to “buy zips when you need them, to the specifications of the project, otherwise they will hang around unused”.
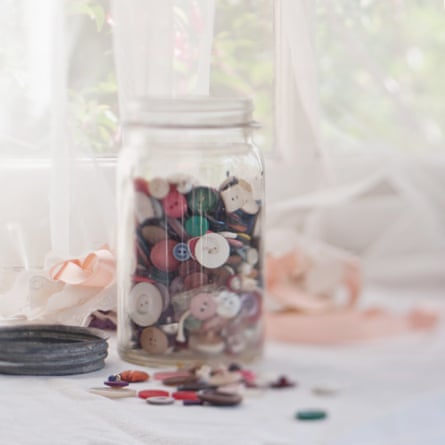
When it comes to buttons, she says, “I cannot recommend starting a household button jar enough! I have my mother’s and grandmothers’, they are large Bushels jars with the orange lid filled to the brim with buttons”.
“There is something especially soothing about taking the time to sort through a jar of buttons to find a matching set for your project.”
The case
When it comes to storage, Vild says, “I love a vintage tin!”
Although any kind of case or box can do, “a simple large size pencil case would work, right through to a dedicated compartmentalised sewing box”.
Simpson prefers a small container, “like a biscuit tin or a lunch box” although something to accommodate the length of the scissors is wise. “I am a fan of a tool roll, a soft case which has a home for everything that can be rolled up neatly.”