
I’ll cut to the chase. If you’ve come here to read my Dyson Airwrap Complete review than you’ve probably heard the the hype and you’re wondering whether it’s worth the exorbitant price tag. I think it is (more on that later) but if you’re on the fence, know that it’s seriously discounted for Amazon Prime Day. The bundle is 20% off making it one of the best Prime Day beauty deals I’ve seen. I’ve owned the Airwrap for over a year and have already given away my blow dryer, flat iron, and curling iron.
A little about me: I have coarse, wavy dry hair. Figuring out how to style it has always been a chore, resulting in a frizzy mess. I’d seen the Dyson on TikTok and heard about it from other shopping editors, but hadn’t tried it for myself until last summer.
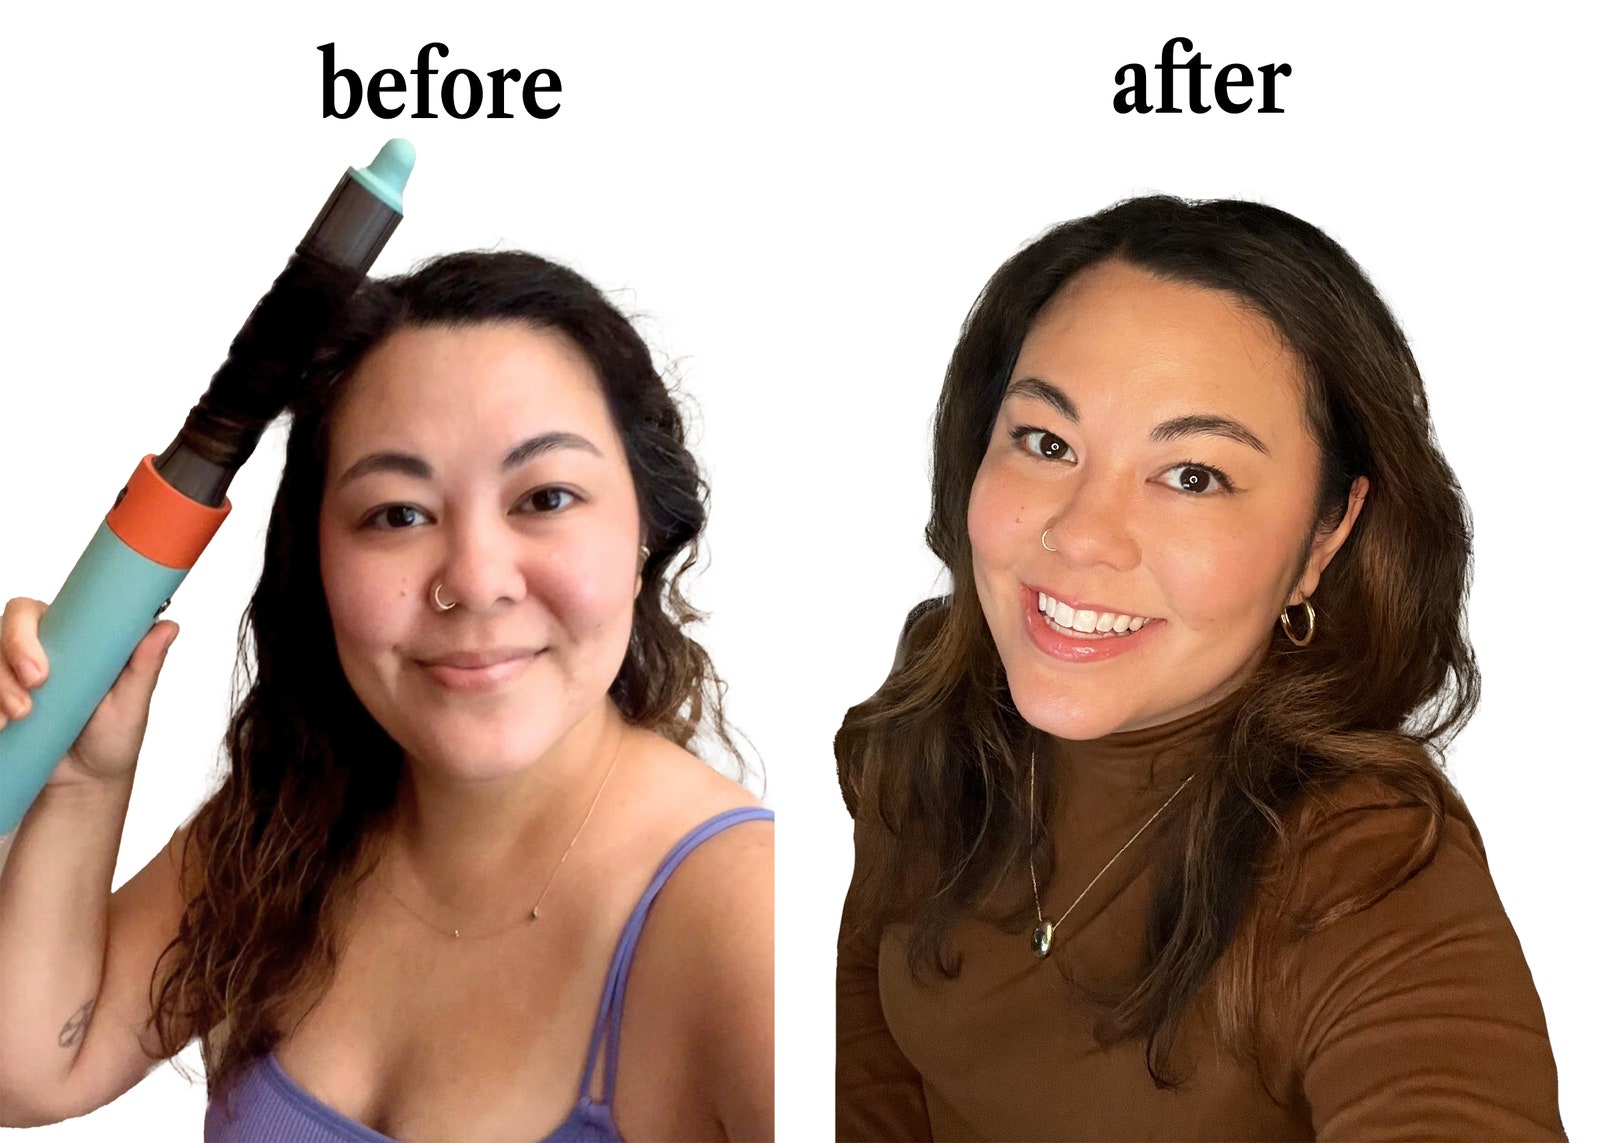
Original photo courtesy of Malia Griggs
What is the Dyson Airwrap?
The original Dyson Airwrap was designed specifically to dry and style long hair, but its more recent version (which came out in 2022) was updated to suit us curly hair and coily-haired people. The multistyler (which is the one I use) comes with six attachments, which are crucial in transforming it into multiple tools. There’s a 1.2-inch barrel, 1.6-inch long barrel, firm smoothing brush, soft smoothing brush, round volumizing brush, and a pre-styling dryer.
How I use the Dyson Airwrap
First, I make sure that my hair is either damp and clean from the shower (don’t start with fully wet hair), or I spray it with water to dampen it. I run some heat protectant cream through it before using its pre-styling dryer to rough-dry and smooth it further. This all takes maybe a couple of minutes in my medium-length hair. I then move in with one of the two curling barrels (they get the most usage from me). The 1.2-inch barrel can create tighter, bouncier curls, while the 1.6-inch barrel’s curls are, for me, looser and tend to relax into waves pretty quickly (especially with humidity). What makes the AirWrap different is that it heats with warm air (instead of burning your hair with hot metal or ceramic plates, like traditional tools). It’s a far gentler way to style your hair—a huge plus with damaged hair like mine.
These curling barrels both do a very cool thing. Instead of having to manually wrap my hair around the barrel, I just hold out a two-inch section of damp hair in one hand, and hover the barrel near the ends with the other. The barrel’s airflow sucks in the hair and then automatically wraps it around, all on its own. I can change the direction of the airflow with a twist of a dial on top, depending on which way I want my hair to curl. I hold it in place for maybe five seconds, then push a button on the base of the Airwrap to activate the “cool shot” (a burst of cold air that locks the curl’s shape in place). I repeat this action in sections all over my head, then set it with spray before loosening the curls a little with my fingers. This entire dry-to-style process takes around 20 minutes—at least half the time of my typical blow dryer/curling wand combo, with at least half the amount of heat damage.
If I want a sleek, straight blowout that doesn’t have frizz, I swap in the firm smoothing brush and press it against sections of my damp hair. For a more voluminous style, I use the round bristle attachment to roll sections of my hair into curls then twist out (very similar to the Revlon One-Step Volumizer). If I want to expedite drying my natural curls, I scrunch with styling cream then use the Airwrap’s handy curl diffuser attachment (an addition I bought that is sadly out of stock at the moment).