
At some point in the culinary discourse, rissoles got lumped in with meatloaf, Viennetta and devils on horseback as “daggy foods”, relegated to the sepia-toned pages of op-shop cookbooks. But everything old is new again, and if you’re looking for a juicy little morsel that can be loaded up with veg and won’t break the bank, it’s time to make like The Castle’s Darryl “What do you call these, love?” Kerrigan and get around the rissole.
Considering the cost-effectiveness of minced meat, it’s not hard to see why you’ll find variations of shaped, grilled patties around the world, from Middle Eastern kofte to Japanese hambagu to Italian polpette. (The Australian rissole, by the way, derives its name from the French dish.)
Growing up in Georgia, kotletki were the “rissoles” of my childhood. Minced burger patties came to the former Soviet Union via the chief food commissar of the Communist party, Anastas Mikoyan. On a visit to the US in 1936, he was so impressed by hamburger machines as a potential solution to feeding the masses back home that he ordered 25 of the contraptions. The hamburger machines were eventually deployed to mass-produce patties which became known as “Mikoyanavskiye katleti”, or Mikoyan cutlets. Though, by the time the second world war broke out, many households (like my family’s) preferred to make their own, as they were wary about what exactly went into these factory-made patties (Mum says at the time, there were jokes about cornflour and toilet paper).
In my rissole recipe, I’ve combined my favourite bits of Mum’s kotletki (the diminutive of “kotleti”) – which are lovely, light and loaded with veg – with a little hambagu magic. The Japanese patties typically contain panko, which help fluff up the rissole mixture.
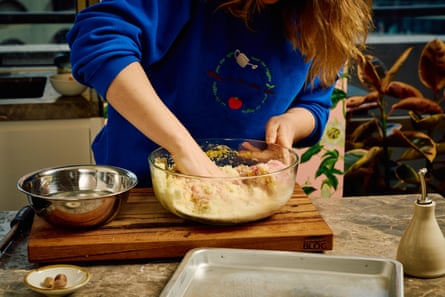
Just give the mixture a really good massage by hand, and some time to chill in the fridge before frying (this gives the rissoles a chance to firm up, too).
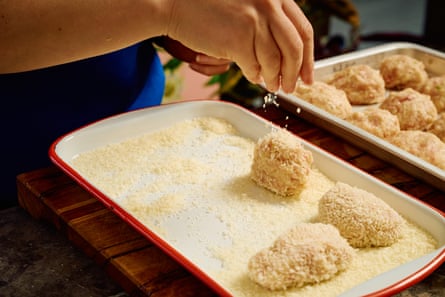
I’ve rolled the rissoles in more panko to help with shaping and for extra crunch. Panko are flatter and wider than western-world breadcrumbs, and when used on the outside of the patty, they crisp up to a wonderful glassy texture when they hit the oil. That being said, if you don’t have panko, feel free to use whatever blitzed-up stale bread you have on hand.
The eggs bind the mixture; so too the kewpie, which also adds a delightful sweet-savouriness, and helps with a golden fry-up. It’s the same principle as swishing mayo instead of butter on the outside of your toastie before frying (and if you haven’t tried that already, consider this your invitation). You could even stir together some garlic powder and kewpie to make a quick and easy “tartare” sauce to serve, or mush together wasabi and kewpie for a wasabi mayo.
The advantage of popping veg into the mince mixture is threefold. Yes, you’re eating more veg; yes, you’re buying less meat; and yes, the rissoles will be juicier thanks to the moisture in the vegetables. I’ve chosen cauliflower because of its mild flavour and pale colour. I’m not one for “hiding veg”, but if you’re that way inclined, your kids won’t be able to see or taste that these are one-quarter “chicken of the soil”.
When it comes to the mince, fat is your friend. Mum’s kotletki recipe is half-chicken, half-turkey, but rather than tracking down the latter, for my version, find the best quality chicken mince you can afford. Lean meat dries out too quickly so, if you can, buy from your local butcher and ask for the schmaltziest mince.
To keep the French-rissole purists happy, I’ve added nutmeg to the mix. This gives a gorgeous sweet, spiced earthiness, while the final fry in butter boosts the flavour. Both of these are optional but excellent additions.
Cauliflower and chicken rissoles with garlicky green beans and tomatoes
This recipe makes 18 rissoles which will serve about six people (two to three rissoles per person is about right). But if you’re a small household, you could cook the full batch, cool and refrigerate the leftovers, and re-fry them another day (the residual oil on the rissoles means you won’t need to add extra in the pan). They will also freeze well.
Kotleti are traditionally served with mash, Mum used to pop them on rye bread with adjika, while hambagu is often served with rice. Here, I’m serving these rissoles with zippy, garlicky green beans and cherry tomatoes (which are such a fab go-to side to have up your sleeve). But really, you can serve them however you like – in a chicken broth with peas and a blob of crispy chilli oil if you’re in a soupy mood; or even in a bun with lettuce if you want the full-circle hamburger experience.
Makes 18 rissoles
250g cauliflower (about a quarter of an average-sized cauliflower), broken into florets, including the core
1 medium onion, peeled and quartered (roughly 150g)
25g panko breadcrumbs (¾ cup), plus extra for crumbing (or 3 pieces stale bread blitzed in a food processor)
500g chicken mince
75g kewpie mayonnaise (¼ cup)
2 eggs
¼ tsp ground white pepper
¼ tsp freshly ground nutmeg
Neutral-flavoured oil for frying (I like grapeseed)
40g butter
For the garlicky green beans and tomatoes
400g green beans
500g cherry tomatoes, halved
2-3 cloves garlic
1 lemon
60ml extra-virgin olive oil (¼ cup)
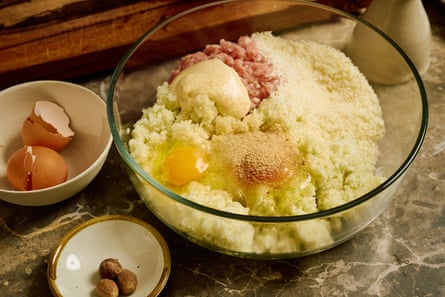
Place cauliflower and onion into the bowl of a food processor and pulse until you have a fine, rice-like texture.
In a large bowl, add the cauliflower mixture, panko, chicken mince, mayonnaise, eggs, white pepper, nutmeg, and a couple of teaspoons of salt and freshly ground pepper to taste. Give the mix a good knead for a couple of minutes until well combined. (Don’t worry if the mixture looks too wet – the panko will do its magic in time!)
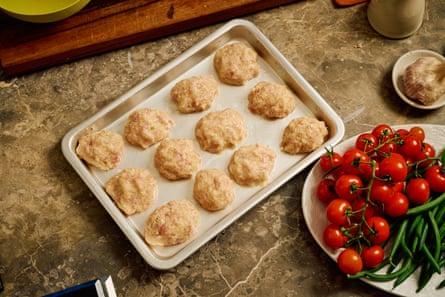
Pop a little bowl of water nearby to wet your hands (this will prevent the mixture from sticking). Take a portion of the mixture and shape into a ball about the size of an apricot, then squish to make a patty about 1cm thick. Place on a plate or tray, repeat with remaining mixture, and refrigerate for about 15 minutes or until you’re ready to cook the rissoles.
While the rissoles are resting, make the garlicky green beans and tomatoes. Bring a medium pot of well-salted water to the boil. Meanwhile, trim the tails from the beans and snap them in half (I like to get my mini sous chef, AKA my child, on to this task). Pop them into the boiling water for three minutes.
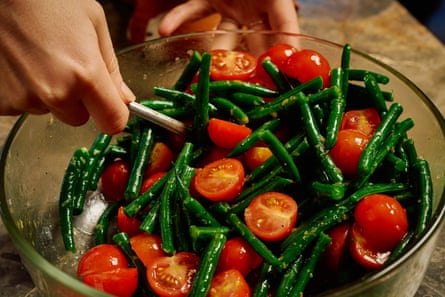
Place the cherry tomatoes in a large heat-proof bowl. Grate the garlic and the zest of half the lemon over the top of the tomatoes, and add a pinch of salt and a crack of pepper.
When the green beans have cooked, drain, then add to the tomato mixture. Add the olive oil and combine. The residual heat from the beans will intensify the flavours and give you a gloriously zippy side dish.
When ready to fry the rissoles, scatter a plate or tray with panko (less is more – you can always add more crumbs as needed).
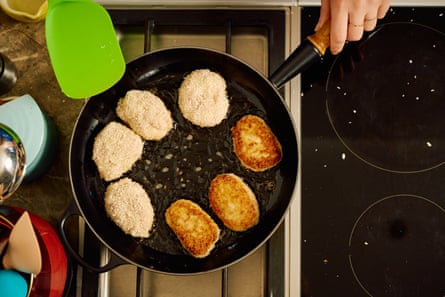
Place a large heavy based nonstick frypan over medium heat and add enough oil to cover the surface – the oil is ready when it starts to shimmer.
While the oil is heating up, place the patties on to the panko-lined tray and shake about to coat.
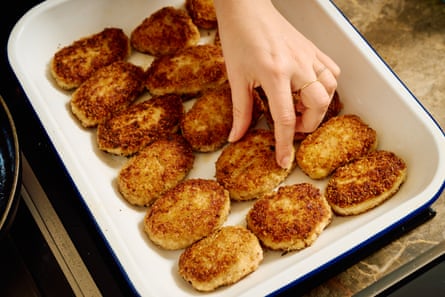
When the oil is ready add the butter to the frypan and allow it to foam. Place about six patties in the pan (don’t overcrowd the pan!) and gently fry for about five minutes on each side until golden and thoroughly cooked through, then remove on to a baking tray. Repeat with the remaining patties, and sprinkle them with salt. (If you like, you can keep the cooked rissoles in an oven, set to a 140C, while you finish frying the remaining rissoles.)
Serve the rissoles with the garlicky green beans and tomatoes.